

A Diamond Drill Bit Can Have Plenty of Diamond — and Still Stop Cutting: The Engineering Balance Between Diamond Exposure, Bond Wear and Self-Sharpening
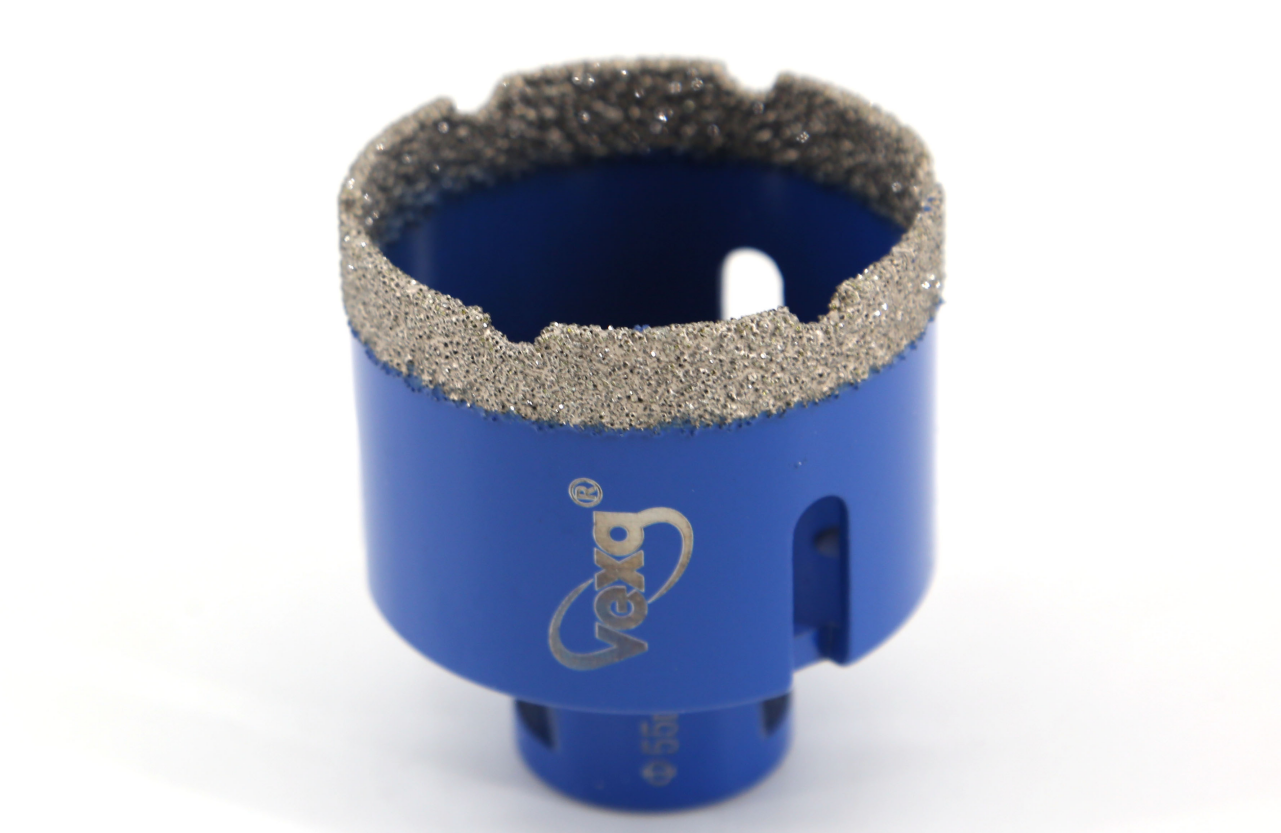
One of the most misleading ways to evaluate a diamond drill bit is to look at how much diamond it contains.
A new bit may have a dense diamond layer.
The diamonds are clearly visible.
The tool cuts quickly.
Then, after several holes, cutting performance begins to decline.
The operator applies more pressure.
Heat increases.
The drilling sound changes.
Eventually, the bit appears to have “lost its diamond.”
But sometimes that is not what happened.
The diamonds are still there.
The problem is that they are no longer exposed in the right way.
This leads to one of the most important principles in diamond tool engineering:
Diamond performance depends not only on diamond quality — but on diamond exposure.
1. A Diamond Is Only Useful When It Can Reach the Workpiece
A diamond particle embedded inside the bond has extremely high hardness.
But hardness alone does not remove material.
For a diamond to cut, part of the diamond must be exposed above the bond surface.
The cutting process can therefore be simplified as:
Diamond Exposure
↓
Contact With Workpiece
↓
Material Removal
↓
Diamond Wear
↓
Bond Wear
↓
Fresh Diamond Exposure
This cycle determines whether the tool continues cutting efficiently.
If the diamond is buried too deeply:
Low Exposure → Low Cutting Efficiency
If too much diamond is exposed without sufficient support:
High Exposure → Excessive Diamond Wear / Breakage
The engineering target lies between these two conditions.
2. What Happens When the Bond Wears Too Slowly?
Imagine a diamond particle embedded in the metal bond.
At the beginning, only the upper portion of the diamond is exposed.
As drilling continues, the diamond gradually wears.
Ideally, the surrounding bond also wears at a controlled rate.
This allows the next portion of the diamond to become exposed.
But what if the bond is too resistant to wear?
The diamond becomes increasingly surrounded by bond material.
Its effective exposure decreases.
The cutting edge becomes less active.
The contact area between tool and workpiece increases.
Friction rises.
Heat increases.
The operator compensates by applying more pressure.
This can create:
Low Bond Wear
→ Reduced Diamond Exposure
→ Higher Friction
→ Higher Temperature
→ Lower Cutting Efficiency
The tool may still contain plenty of diamond.
But the diamond is no longer functioning efficiently as a cutting element.
This is one mechanism behind what operators often describe as:
“The bit has become glazed.”
3. What Happens When the Bond Wears Too Quickly?
Now consider the opposite condition.
If the bond releases material too aggressively, diamond particles may become exposed rapidly.
At first, this can produce excellent cutting performance.
But the exposed diamonds may not have enough support.
The result can be:
Premature diamond pull-out
Rapid diamond consumption
Unstable cutting
Short tool life
Higher cost per hole
In other words:
Too Much Bond Retention
can suppress diamond exposure.
But:
Too Little Bond Retention
can waste diamond.
The engineering challenge is to create a controlled relationship between the two.
4. Self-Sharpening Does Not Mean “The Diamond Sharpens Itself”
The term self-sharpening is often misunderstood.
A diamond drill bit does not magically make a worn diamond sharp again.
Instead, self-sharpening is related to the controlled renewal of effective cutting points.
A useful wear sequence can be:
Diamond Wears
→ Diamond Fractures
→ New Cutting Edges Appear
→ Bond Gradually Wears
→ Fresh Diamond Surface Becomes Exposed
This creates a continuously renewing cutting interface.
The important question is therefore not:
“How long can we keep the same diamond?”
It is:
“Can the tool continuously expose effective cutting edges before friction overwhelms the cutting process?”
That is a much more useful way to evaluate diamond tool performance.
5. Diamond Size Changes the Wear Behavior
Diamond particles are not all the same size.
The relationship between diamond size and bond structure can significantly influence cutting behavior.
Larger diamond particles can provide larger individual cutting points.
Smaller diamond particles can create a greater number of cutting points within the same area.
But changing diamond size also changes:
Individual grain loading
Exposure height
Bond support
Fracture behavior
Surface roughness
Cutting resistance
Therefore:
Diamond Size ≠ Simple Quality Ranking
A larger diamond is not automatically better.
A smaller diamond is not automatically better.
The correct choice depends on the workpiece, drilling conditions, required hole quality, and desired cutting behavior.
6. Diamond Concentration Changes Load Distribution
Now add another variable:
Diamond Concentration
Consider two cutting surfaces.
Lower Concentration
Fewer active diamonds carry the cutting load.
Each individual diamond may experience greater loading.
This can create strong individual cutting action, but may also accelerate grain wear.
Higher Concentration
More diamonds participate in the cutting interface.
The load can be distributed across more cutting points.
However, excessive concentration can reduce the effective load carried by individual diamonds and change the cutting interaction.
So again, there is no universal answer.
The engineering relationship is closer to:
Diamond Size
× Diamond Concentration
× Diamond Exposure
× Bond Wear Rate
rather than any single parameter.
7. Bond Hardness Is Really About Wear Matching
A common mistake is to think:
Harder Bond = Longer Life
Not necessarily.
A harder bond may retain diamond particles more strongly.
That can be beneficial when diamond pull-out is the limiting failure mechanism.
But if the bond does not wear at an appropriate rate, worn diamonds may remain trapped.
The tool can become increasingly dependent on friction instead of effective cutting.
Conversely, a softer or faster-wearing bond can expose fresh diamond more rapidly.
But excessive bond wear can consume the tool too quickly.
Therefore, the better concept is:
Bond Wear Matching
The bond should wear at a rate compatible with:
Diamond Wear
Diamond Fracture
Workpiece Abrasiveness
Cutting Pressure
Thermal Conditions
This is why the same bond formulation cannot necessarily be optimized for every material.
8. The Workpiece Changes the Ideal Wear Mechanism
The diamond tool does not operate in isolation.
The workpiece is part of the wear system.
Abrasive materials, dense stone, ceramics, porcelain, glass, and other hard materials can produce very different interactions at the cutting interface.
The workpiece influences:
Cutting resistance
Abrasive wear
Heat generation
Bond wear
Diamond fracture
Debris formation
This creates a fundamental engineering principle:
The ideal diamond tool is application-specific.
A tool that performs extremely well on one material may glaze quickly on another.
Another formulation may sacrifice some initial speed but maintain a much more stable cutting rate.
That is not necessarily a quality difference.
It may simply be a wear-system mismatch.
9. Heat Can Change the Entire Wear Balance
Temperature is not just a secondary issue.
It can influence the interaction between:
Diamond
Bond
Workpiece
Debris
As temperature increases, friction can increase and the bond's behavior can change.
This can alter diamond retention and exposure.
The system may shift from:
Cutting
toward:
Friction
And once friction dominates, the operator usually responds by increasing pressure.
That creates another feedback loop:
Reduced Cutting
→ Higher Pressure
→ Higher Friction
→ More Heat
→ Changed Wear Behavior
→ Further Reduction in Cutting
This is why a diamond drill bit that appears to “suddenly die” may actually have been moving toward an unstable thermal and wear condition for several holes.
10. The Real Performance Curve Is Not “Holes per Bit”
A common way to compare diamond drill bits is:
“How many holes can it drill?”
Useful—but incomplete.
Imagine:
Bit A
Fast first 5 holes
Then rapidly declines
Bit B
Slightly slower initial cutting
Maintains stable performance for 20 holes
If Bit B produces significantly more useful holes with lower pressure and more consistent hole quality, it may be the better production tool.
Therefore, a more complete evaluation should consider:
Cutting Speed
Useful Hole Count
Hole Quality
Pressure Requirement
Heat Generation
Cost per Hole
This changes the question from:
“How long does the bit last?”
to:
“How much useful drilling does the bit deliver before performance becomes unacceptable?”
11. M14 and Hex Shank — The Same Wear Principle, Different Operating Environment
This is particularly relevant when comparing our two diamond drill bit configurations.
M14
Designed for suitable angle-grinder platforms.
The operating environment can involve higher rotational speed and a different pressure-control method.
Hex Shank
Designed for compatible electric drill platforms.
The available speed, torque, operator control, and drilling technique can be different.
The diamond cutting mechanism remains fundamentally the same.
But the operating conditions change the wear system.
That means the same diamond specification should not automatically be assumed to deliver identical performance on both machine platforms.
Tool + Machine + Workpiece
must be considered as one system.
12. The VEXA Engineering Perspective
At VEXA, we look at diamond drill bits through the relationship between diamond exposure and controlled bond wear.
The key variables include:
Diamond Type
× Diamond Size
× Diamond Concentration
× Diamond Exposure
× Bond Hardness
× Bond Wear Rate
× Cutting Geometry
× Heat Management
× Debris Evacuation
× Machine Interface
× Workpiece Characteristics
The objective is not to maximize diamond retention.
It is not to maximize diamond concentration.
And it is not simply to maximize tool life.
The objective is to create a controlled cycle:
Effective Diamond Exposure
→ Material Removal
→ Controlled Diamond Wear
→ Bond Wear
→ Fresh Cutting Edge
→ Continued Material Removal
When this cycle is properly balanced, the tool can maintain useful cutting performance throughout a much larger portion of its working life.
Engineering Takeaway
A diamond drill bit can contain plenty of diamond and still stop cutting effectively.
The critical factor is not simply:
How much diamond is present?
It is:
How effectively is the diamond being exposed, supported, worn, and renewed?
Too much bond retention can bury useful diamond.
Too little retention can waste diamond.
Poor thermal control can destabilize the wear process.
And the wrong diamond/bond combination can make an excellent tool behave poorly on the wrong material.
This is why diamond tool engineering is fundamentally a wear-management problem.
The goal is not to make the diamond last forever.
The goal is to keep exposing useful diamond for as long as possible.
Comparing diamond drill bits?
If you are experiencing:
Fast initial drilling → Rapid slowdown
Bit glazing
Excessive heat
Premature diamond loss
Short tool life
send us:
Hole Diameter + Workpiece Material + Hole Depth + Machine Type + Current Bit + Expected Hole Quantity
Whether you are using:
M14 → Angle Grinder
or
Hex Shank → Electric Drill
we can evaluate the working conditions and recommend a suitable diamond/bond configuration for comparative testing.
VEXA — Professional through focus.


